With the Python library TensorFlow, we can easily build a Convolutional Neural Network that we possibly use, for example, to classify images. In a previous article, we looked at how such a Convolutional Neural Network works in theory. Now we want to create and train it.
Which data set do we use?
Tensorflow has a wide variety of datasets that we can download and use with just a few lines of code. This is especially helpful when you want to test new models and their implementation and therefore do not want to search for appropriate data for a long time. In addition, Google also offers a dataset search, with which one can find a suitable dataset within a few clicks.
For our exemplar Convolutional Neural Network, we use the CIFAR10 dataset, which is available through Tensorflow. The dataset contains a total of 60,000 images in color, divided into ten different image classes, e.g. horse, duck, or truck. We note that this is a perfect training dataset as each class contains exactly 6,000 images. In classification models, we must always make sure that every class is included in the dataset an equal number of times, if possible. For the test dataset, we take a total of 10,000 images and thus 50,000 images for the training dataset.
Each of these images is 32×32 pixels in size. The pixels in turn have a value between 0 and 255, where each number represents a color code. Therefore, we divide each pixel value by 255 so that we normalize the pixel values to the range between 0 and 1.

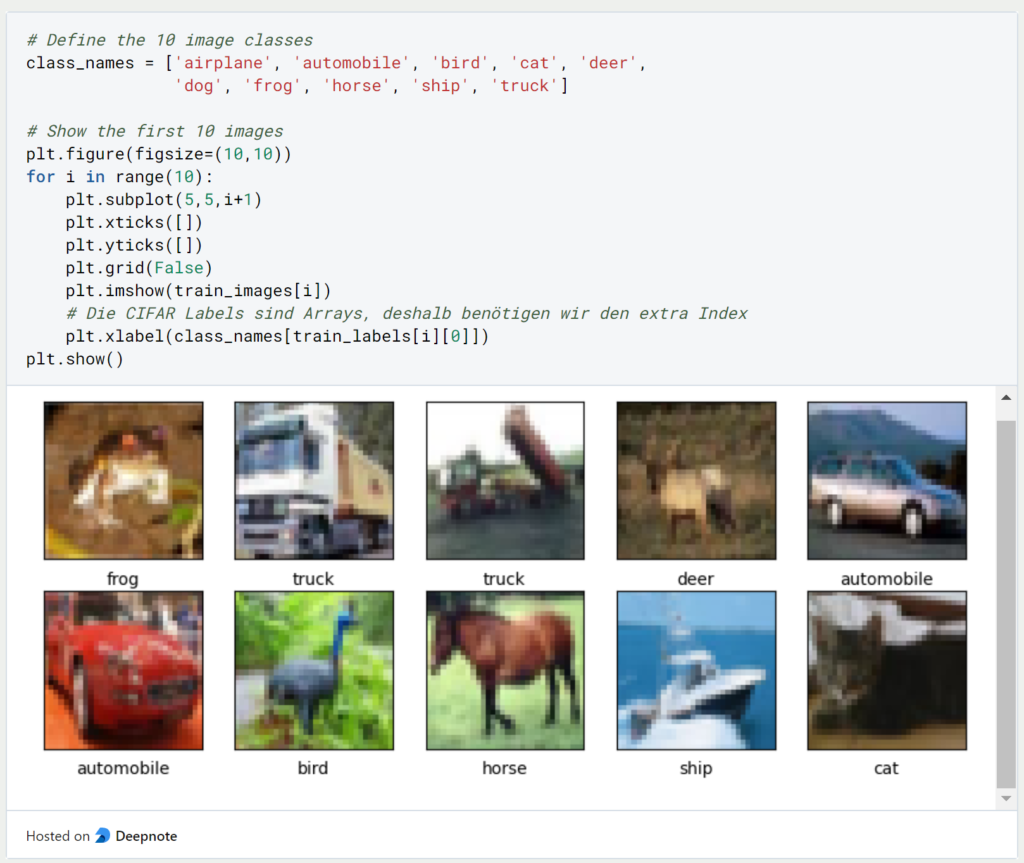
To check that all images are displayed correctly, we print the first ten images including the class they belong to. Since these are only 32×32 images, they are relatively blurry, but you can still tell which class they are part of.
How do we build the Convolutional Neural Network?
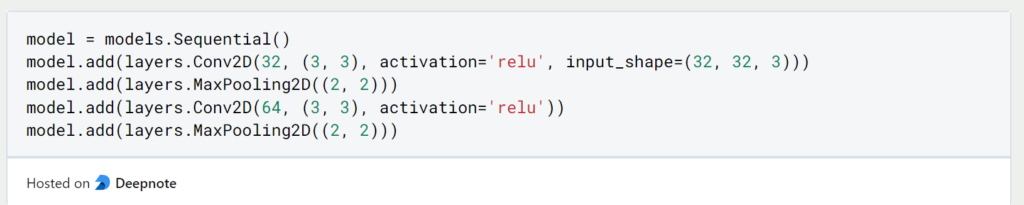
In Tensorflow we can now build the Convolutional Neural Network by defining the sequence of each layer. Since we are dealing with relatively small images we will use the stack of Convolutional Layer and Max Pooling Layer twice. The images have, as we already know, 32 height dimensions, 32 width dimensions, and 3 color channels (red, green, blue).
The Convolutional Layer uses first 32 and then 64 filters with a 3×3 kernel as the filter and the Max Pooling Layer searches for the maximum value within a 2×2 matrix. If you are still unfamiliar with this approach, you are welcome to read the theoretical article on Convolutional Neural Networks again.
After these two stacks, we have already reduced the dimensions of the images significantly, to 6 height pixels, 6 width pixels, and a total of 64 filters. With a third and final convolutional layer, we reduce these dimensions further to 4x4x64. Before we now build a fully meshed network from this, we replace the 3×3 matrix per image, with a vector of 1024 elements (4*4*64), without losing any information.
Now we have sufficiently reduced the dimensions of the images and can add one more hidden layer with a total of 64 neurons before the model ends in the output layer with the ten neurons for the ten different classes.

The model with a total of 122,570 parameters is now ready to be built and trained.
Compile and Train the Model
Before we can start training the Convolutional Neural Network, we have to compile the model. In it we define which loss function the model should be trained according to, the optimizer, i.e. according to which algorithm the parameters change, and which metric we want to be shown in order to be able to monitor the training process.

How to evaluate the model?
After training the Convolutional Neural Network for a total of 10 epochs, we can look at the progression of the model’s accuracy to determine if we are satisfied with the training.


Our prediction of the image class is correct in about 80% of the cases. This is not a bad value, but not a particularly good one either. If we want to increase this even further, we could have the Convolutional Neural Network trained for more epochs or possibly configure the dense layers even differently.
This is what you should take with you
- Convolutional neural networks can be programmed in just a few steps using Tensorflow.
- It is important to adjust the arrangement of the convolutional and max-pooling layers to each different use case.
Thanks to Deepnote for sponsoring this article! Deepnote offers me the possibility to embed Python code easily and quickly on this website and also to host the related notebooks in the cloud.

What are Microservices?
Build scalable and modular applications with microservices. Enable flexible, independent services for efficient development and deployment.

What is Named Entity Recognition (NER)?
Explanation of Named Entity Recognition with examples and applications.

Sentiment Analysis with BERT and TensorFlow
Using BERT Embedding for text classification of IMDb movie ratings.

Web Scraping with Python – in 5 minutes to a working Web Scraper!
Web scraping using Python and the Beautiful Soup library as an example.
Other Articles on the Topic of Convolutional Neural Network in Tensorflow
- This article is based on the example of Tensorflow.

Niklas Lang
I have been working as a machine learning engineer and software developer since 2020 and am passionate about the world of data, algorithms and software development. In addition to my work in the field, I teach at several German universities, including the IU International University of Applied Sciences and the Baden-Württemberg Cooperative State University, in the fields of data science, mathematics and business analytics.
My goal is to present complex topics such as statistics and machine learning in a way that makes them not only understandable, but also exciting and tangible. I combine practical experience from industry with sound theoretical foundations to prepare my students in the best possible way for the challenges of the data world.