In the world of data science and web application development, creating interactive and data-driven apps can often be a complex and time-consuming task. However, with the emergence of Streamlit, developers now have a powerful and intuitive tool that makes building and sharing apps incredibly simple.
In this article, we will explore the world of Streamlit and discover how it revolutionizes Python app development. We’ll dive into the key features and benefits of using the library, discuss its intuitive and straightforward API, and explore real-world use cases where Streamlit shines.
What is Streamlit?
Streamlit is a Python library that allows you to create beautiful and interactive web applications using only a few lines of code. It is designed to streamline the process of building data-focused apps, enabling developers to quickly iterate and showcase their work without getting caught up in the complexities of web development.
Whether you’re a data scientist, machine learning engineer, or web developer, Streamlit offers a seamless workflow that allows you to transform your Python code into interactive apps effortlessly. So, let’s embark on this journey to uncover the power and versatility of Streamlit and unlock new possibilities in Python app development.
How do you install it and set it up?
To start building interactive web applications with Streamlit, you’ll need to install it and set it up in your Python environment. Follow the steps below to get it up and running:
- Install Streamlit: Open your terminal or command prompt and run the following command to install Streamlit using pip, the Python package manager:

- Verify the Installation: After the installation is complete, you can verify it by running the following command in your terminal:
This will display the version number of Streamlit if the installation was successful.
- Create a New Python Script: Start by creating a new Python script in your desired directory. You can use any text editor or integrated development environment (IDE) of your choice.
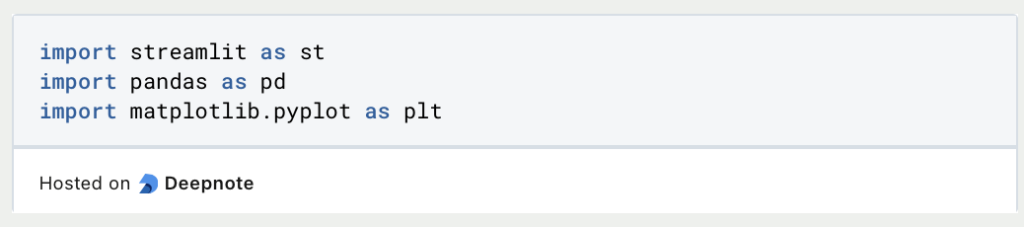
- Import the library and Write Code: In your Python script, import the Streamlit library by adding the following line at the beginning:

- Build Your App: Begin building your app by adding code to create interactive elements, load data, and define the app’s behavior. You can use various Streamlit components like buttons, sliders, text inputs, and data visualization tools to enhance the interactivity and visual appeal of your app.
- Run Your App: Save the Python script and run it from the command line using the following command:

Replace “your_script.py” with the name of your Python script file.
- View Your App: After running the command, Streamlit will start a local development server and provide a URL. Open that URL in your web browser to view and interact with your app.
Congratulations! You have successfully installed and set up the library in your Python environment. Now you can unleash your creativity and start building interactive web applications with ease using Streamlit’s intuitive API and rich set of features.
What are the basic functions of Streamlit?
Streamlit provides a variety of functions and calls that make it easy to create interactive web applications. Here are some of the essential functions and their usage:
st.write(): This versatile function allows you to display text, dataframes, charts, images, and more. It automatically adapts to the data type you pass to it. For example:

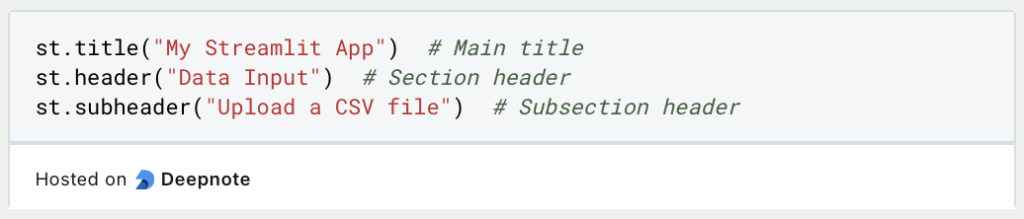
st.title(),st.header(),st.subheader(): These functions allow you to create various levels of headings for your app. For example:
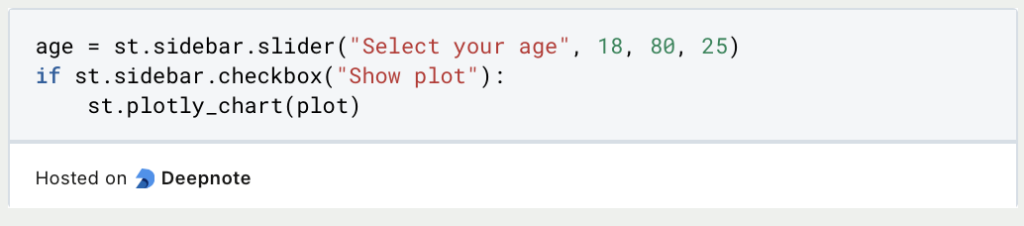
st.sidebar: This function creates a sidebar that can contain additional controls or information. You can use it to add widgets, such as sliders, checkboxes, and select boxes, for user interaction. For example:
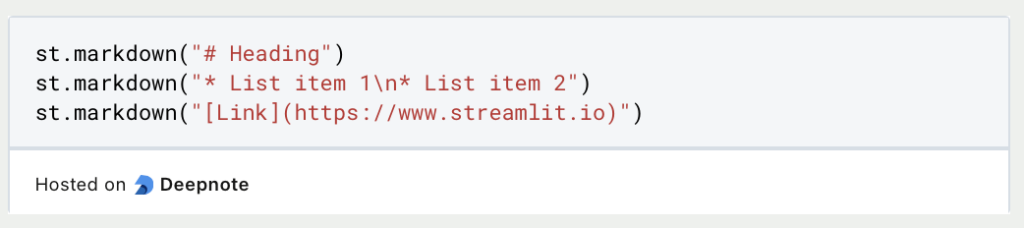
st.markdown(): This function allows you to render Markdown-formatted text in your app. You can use it to format text, add headings, lists, links, and more. For example:
st.button(),st.checkbox(),st.radio(),st.selectbox(),st.multiselect(): These functions enable user interaction by providing buttons, checkboxes, radio buttons, dropdowns, and multi-selection dropdowns. For example:

These are just a few of the many functions and calls available in Streamlit. They allow you to create dynamic and interactive web applications with minimal effort. Explore the Streamlit documentation to discover more advanced features and customize your apps to meet your specific needs.
How do you build a simple app?
Streamlit is a powerful Python library that allows you to quickly create interactive web applications for data analysis and visualization. Follow the steps below to get started with Streamlit:
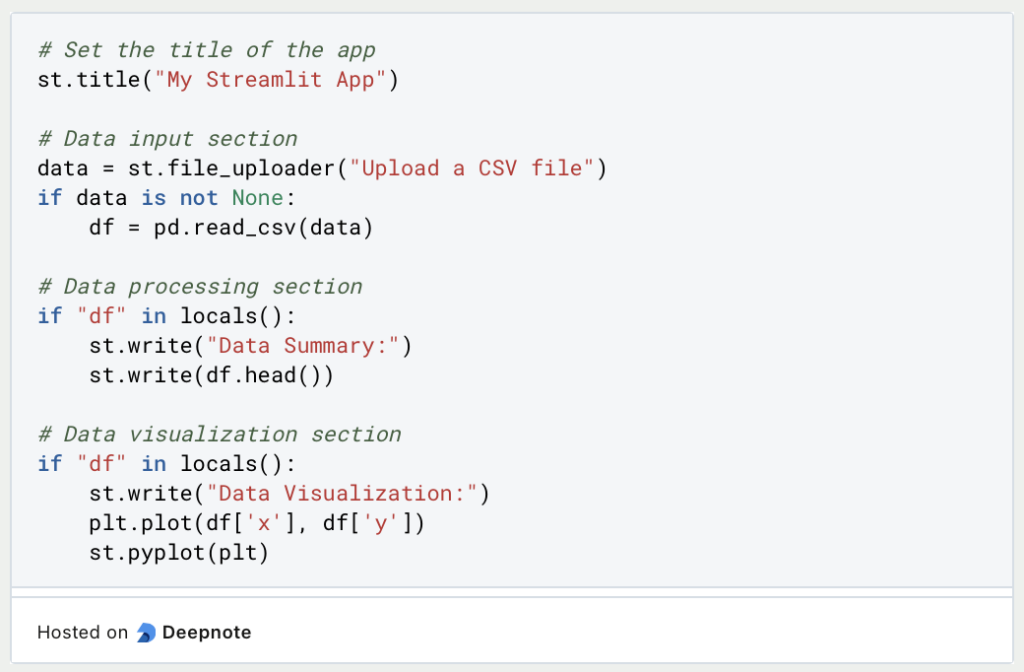
- Import Necessary Libraries: In your Python script, import the required libraries that you need for building your application. Here’s an example:
- Create the Basic Structure: Set up the basic structure of your Streamlit application. Typically, you’ll start with a title, followed by sections for data input, processing, and visualization. Here’s a basic example:
- Run the App Locally: Save the Python script and run it from the command line using the following command:

Replace “your_script.py” with the name of your Python script file.
- Interact with Your App: After running the command, Streamlit will start a local development server and provide a URL. Open that URL in your web browser to view and interact with your app. Any changes made to the script will automatically update the app in real-time.
That’s it! You’re now ready to create interactive web applications using Streamlit. Experiment with different components, import additional libraries as needed, and unleash the full potential of your data analysis and visualization projects.
How do you handle User Input and User Interaction?
Streamlit provides easy ways to handle user input and create interactive applications. You can use various functions and methods to capture user input and respond accordingly. Here are some important techniques for handling user input in Streamlit applications:
- Text Input: Use the
st.text_input()function to capture user input as text. Simply provide a label and assign the input to a variable. For example, you can ask for the user’s name and display a personalized message. - Numeric Input: Use the
st.number_input()function to capture numeric input. You can specify the minimum and maximum values, step size, and default value. This is useful for collecting numerical data from users. - Dropdown Selection: The
st.selectbox()function allows users to choose an option from a dropdown menu. You can provide a list of options and assign the selected value to a variable. This is helpful when you have predefined choices for users to select from. - Checkbox Selection: The
st.checkbox()function creates a checkbox that users can toggle. You can assign the state of the checkbox to a variable, allowing you to capture boolean input. This is useful for capturing binary choices or enabling/disabling certain features. - Button Click: The
st.button()function creates a clickable button that users can press. You can associate an action or function with the button click event. This is helpful for triggering specific actions based on user interactions.
By leveraging these input-handling functions in Streamlit, you can create dynamic and user-friendly applications that respond to user input in real-time. Experiment with different input methods to build interactive and engaging Streamlit apps.
How do you deploy an App?
Once you have developed your Streamlit application, you can deploy it to share it with others. The library offers various deployment options to make your app accessible to a wider audience. Here’s a step-by-step guide on how to deploy an app in Streamlit using Python:
(1) Prepare Your App:
- Ensure your app runs without errors and meets the necessary requirements.
- Make sure you have all the dependencies and data files in place.
(2) Set Up Deployment Platform:
- Choose a deployment platform such as Heroku, AWS, or Azure.
- Install the necessary command-line tools and create an account if required.
(3) Configure Deployment Settings:
- Create a requirements.txt file that lists all the dependencies your app requires.
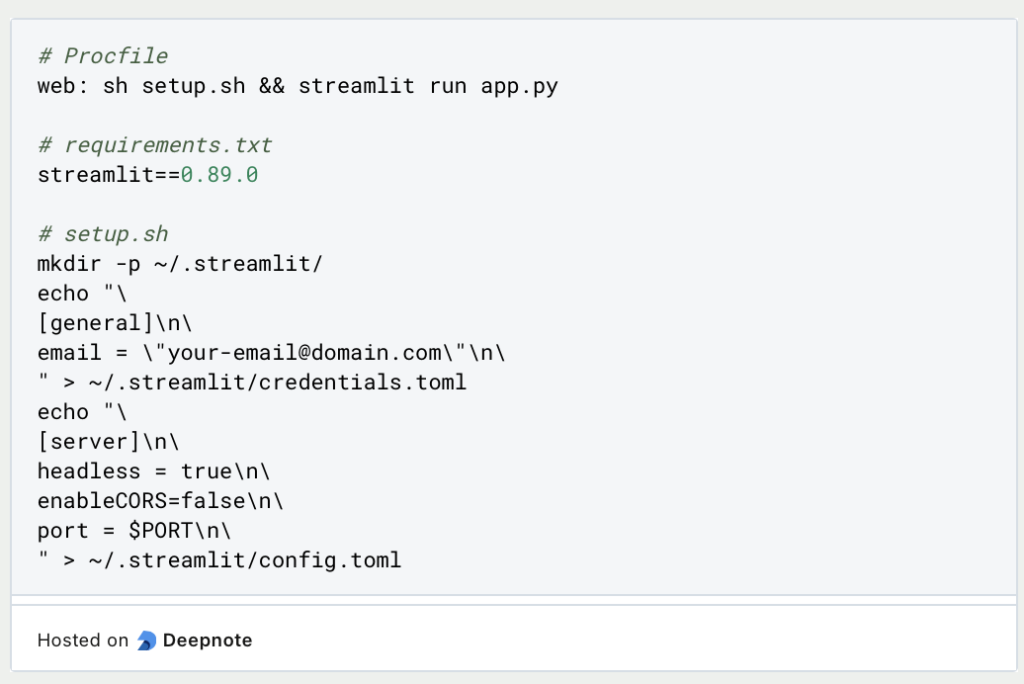
- Specify the Python version and other runtime configurations in a configuration file (e.g., Procfile for Heroku).
(4) Deploy the App:
- Connect your local development environment to the deployment platform.
- Use the platform-specific commands or GUI tools to deploy your app.
- For example, deploying to Heroku can be as simple as running
git push heroku mainin your app’s directory.
(5) Monitor and Test:
- Once deployed, monitor your app to ensure it functions as expected.
- Test all the features and functionalities to confirm they work correctly.
- Utilize logging and error reporting tools provided by the deployment platform to identify and fix any issues.
(6) Share Your App:
- Once your app is successfully deployed, share the deployment URL or provide access to your users.
- They can then access and interact with your Streamlit app through their web browsers.
Here is a short example of how such a setup could look like with Heroku:
By following these steps and using the appropriate commands or tools provided by your chosen deployment platform, you can easily deploy your Streamlit app and make it available for others to use. Share the deployment URL and let users easily access your interactive app.
What are the differences between Plotly Dash and Streamlit?
Plotly Dash and Streamlit are two popular Python frameworks used for building interactive web applications. While they share similar goals, there are distinct differences that set them apart:
- Purpose and Philosophy: Plotly Dash focuses on creating highly customizable and data-driven web applications, offering fine-grained control over layout and interactivity. Streamlit, on the other hand, emphasizes simplicity and rapid prototyping, providing an intuitive interface for data app development.
- Development Experience: Plotly Dash requires more coding expertise and familiarity with web development concepts to create complex dashboards and visualizations. Streamlit simplifies the development process by offering a declarative approach, allowing users to create apps using simple Python scripts.
- Components and Libraries: Plotly Dash provides a wide range of interactive components and integrates well with Plotly.js, enabling advanced visualizations. Streamlit offers a streamlined set of components focused on data visualization and integrates seamlessly with popular data science libraries.
- Performance: Plotly Dash, built on Flask and Plotly.js, offers high performance and scalability, making it suitable for handling large datasets and complex visualizations. Streamlit, optimized for quick prototyping and data exploration, provides sufficient speed for most data app development tasks.
- Community and Ecosystem: Plotly Dash benefits from a large and active community, extensive documentation, and a broad ecosystem that includes Plotly.py for interactive plots. Streamlit has gained popularity in the data science community and is steadily growing its ecosystem of extensions and community-contributed components.
Ultimately, the choice between Plotly Dash and Streamlit depends on specific project requirements, the complexity of the application, and the developer’s familiarity with web development concepts. Plotly Dash excels in customizable, performance-intensive applications, while Streamlit shines in rapid prototyping and creating interactive visualizations with minimal effort.
This is what you should take with you
- Streamlit is a powerful Python framework for building interactive web applications.
- It simplifies the development process by providing a declarative approach and an intuitive interface.
- With Streamlit, developers can quickly prototype and deploy data apps with minimal effort.
- It offers a wide range of built-in components for data visualization and integrates seamlessly with popular data science libraries and allows for easy handling of user input and interaction within the application.
- Streamlit’s simplicity does not compromise performance, making it suitable for most data app development tasks.
- The growing community and ecosystem around Streamlit provide ample resources and support for developers.
- Streamlit is an excellent choice for data scientists, machine learning engineers, and developers looking to create interactive and data-driven applications.
What is Jenkins?
Mastering Jenkins: Streamline DevOps with Powerful Automation. Learn CI/CD Concepts & Boost Software Delivery.

What are Conditional Statements in Python?
Learn how to use conditional statements in Python. Understand if-else, nested if, and elif statements for efficient programming.

What is XOR?
Explore XOR: The Exclusive OR operator's role in logic, encryption, math, AI, and technology.

How can you do Python Exception Handling?
Unlocking the Art of Python Exception Handling: Best Practices, Tips, and Key Differences Between Python 2 and Python 3.

What are Python Modules?
Explore Python modules: understand their role, enhance functionality, and streamline coding in diverse applications.
What are Python Comparison Operators?
Master Python comparison operators for precise logic and decision-making in programming.
Other Articles on the Topic of Streamlit
Please find the official documentation here.

Niklas Lang
I have been working as a machine learning engineer and software developer since 2020 and am passionate about the world of data, algorithms and software development. In addition to my work in the field, I teach at several German universities, including the IU International University of Applied Sciences and the Baden-Württemberg Cooperative State University, in the fields of data science, mathematics and business analytics.
My goal is to present complex topics such as statistics and machine learning in a way that makes them not only understandable, but also exciting and tangible. I combine practical experience from industry with sound theoretical foundations to prepare my students in the best possible way for the challenges of the data world.